信息
文章中可能会出现一些错误,希望大佬们可以在评论区指出错误,感谢支持!
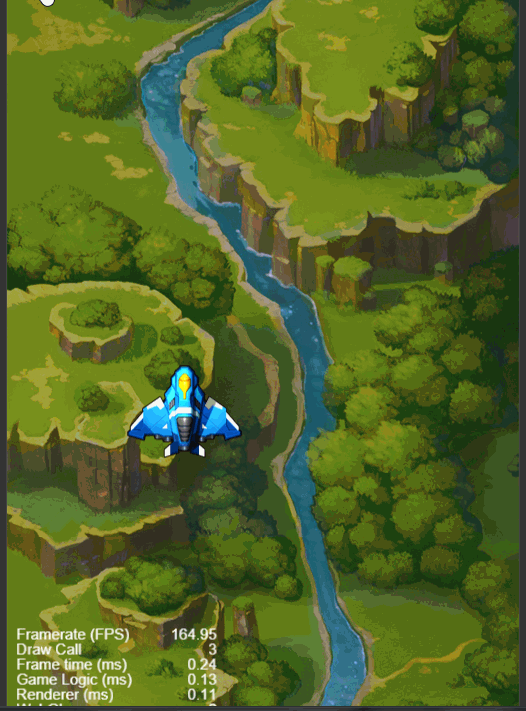
新开了个经典飞机大战项目Plane,用于进一步学习Cocos2D。
今天工作量:
- 和前一个项目重复的功能(背景移动,虚拟摇杆等)
- 实现资源预加载(Loading界面,Js类,单例模式,引擎API)
- 实现选关功能(资源管理,
PageView控件)
飞机随按压点移动
类似于前一个项目的虚拟摇杆:
// Rocker.js
cc.Class({
    extends: cc.Component,

    properties: {
        touchLayerNode: cc.Node,
        targetNode: cc.Node,
        accel: 0,
    },

    // LIFE-CYCLE CALLBACKS:

    onLoad() {
        // 绑定触屏事件
        this.touchLayerNode.on(cc.Node.EventType.TOUCH_START, this.onTouchStartAndMove, this);
        this.touchLayerNode.on(cc.Node.EventType.TOUCH_MOVE, this.onTouchStartAndMove, this);
        this.touchLayerNode.on(cc.Node.EventType.TOUCH_END, this.onTouchEndAndCancel, this);
        this.touchLayerNode.on(cc.Node.EventType.TOUCH_CANCEL, this.onTouchEndAndCancel, this);
    },

    start() {
        this.speed = 0;
        this.moveDir = cc.v2(0, 0);
        this.clickPos = cc.v2(0, 0);
    },

    update(dt) {
        if (this.targetNode && this.speed && this.targetNode.position.sub(this.clickPos).len() <= 1) {
            return;
        }

        this.targetNode.x += this.moveDir.x * this.speed * dt;
        this.targetNode.y += this.moveDir.y * this.speed * dt;
    },

    // vvvvvvvvvv 触屏事件回调 vvvvvvvvvv
    onTouchStartAndMove(event) {
        let clickWorldPos = event.getLocation();
        this.clickPos = this.touchLayerNode.convertToNodeSpaceAR(clickWorldPos);
        this.moveDir = this.clickPos.sub(this.targetNode.position).normalize();
        this.speed = this.clickPos.sub(this.targetNode.position).len() * this.accel;
    },

    onTouchEndAndCancel(event) {
        this.moveDir = cc.v2(0, 0);
        this.speed = 0;
    },
    // ^^^^^^^^^^ 触屏事件回调 ^^^^^^^^^^
});
需要先获取点击的世界空间坐标,然后使用node.convertToNodeSpaceAR()将其转换为场景的模型空间坐标,最后便能用飞机的模型空间坐标获取飞机飞向点击点的方向。飞机的飞行速度为两点间的距离乘上一个固定参数。
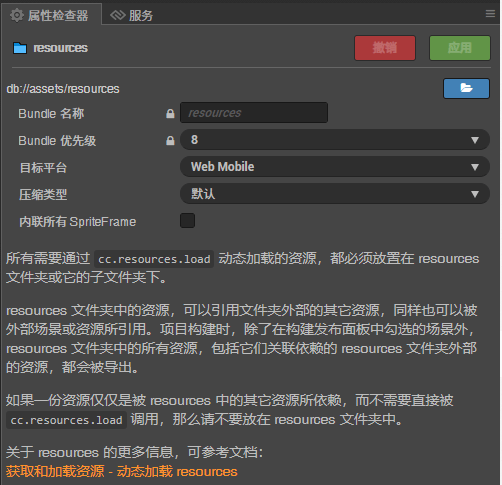
资源预加载
可以用cc.resources.X()进行资源的预加载,不过需要注意的是,要想使用这类API,**必须在assets**文件夹下新建一个名字是resources的文件夹:
使用cc.resources.loadDir()可以读取resources文件夹下的所有资源:
// 只读取assets/resources下的资源
cc.resources.loadDir('./', function (err, assets) {
    if (err) {
        console.log('[Scene Load]:项目资源加载错误');
        return;
    }

    // 要使用管理者, 得先进行import
    let resMgr = ResourceManager.getInstance();
    let dataMgr = DataManager.getInstance();
    for (let asset of assets) {
        if (asset instanceof cc.SpriteFrame) {
            resMgr.arrSpriteFrame.push(asset);
        } else if (asset instanceof cc.JsonAsset) {
            dataMgr.arrLevelData = asset.json;
        }
    }
});
例如上方代码就是读取resources下的所有资源,如果报错会提前退出游戏,否则将精灵信息存入resMgr单例中,将关卡信息存入dataMgr中。
其中,资源管理者和数据管理者的代码如下,它们采用单例模式:
// ResourceManager.js
class ResourceManager {

    // member
    arrSpriteFrame = [];

    // function
    static getInstance() {
        if (!ResourceManager.instance) {
            ResourceManager.instance = new ResourceManager();
        }
        return ResourceManager.instance;
    }

    getSpriteFrameByName(name) {
        for (let spriteFrame of this.arrSpriteFrame) {
            if (spriteFrame.name === name) {
                return spriteFrame;
            }
        }
        return null;
    }
}

module.exports = ResourceManager;
// DataManager.js
class DataManager {
    // member
    arrLevelData;

    // function
    static getInstance() {
        if (!DataManager.instance) {
            DataManager.instance = new DataManager();
        }
        return DataManager.instance;
    }

    getLevelDataById(id) {
        for (let data of this.arrLevelData) {
            if (data.id === id) {
                return data;
            }
        }
        return null;
    }
}

module.exports = DataManager;
实现选关功能
PageView控件相关
配置好ui后,开始写逻辑。这里用到它的touch-up事件:
// Level.js
onLoad() {
    this.pageView.node.on("touch-up", function (pageView) {
        // 防误触
        if (pageView.isScrolling()) {
            return;
        }

        let index = pageView.getCurrentPageIndex();
        let id = index + 1001;
        cc.planeGame = {};
        cc.planeGame.levelId = id;
        cc.director.loadScene("Game");
    }, this);
},
拖拽好关卡后,单击图片传对应关卡Id,然后交给游戏场景处理。
游戏场景相关
要用到传进来的数据和两个管理者:
// Game.js
onLoad() {
    this.resMgr = ResourceManager.getInstance();
    this.dataMgr = DataManager.getInstance();

    let levelData = this.dataMgr.getLevelDataById(cc.planeGame.levelId);
    let bgSpriteFrame = this.resMgr.getSpriteFrameByName(levelData.bgPath);
    this.background[0].spriteFrame = this.background[1].spriteFrame = bgSpriteFrame;
},
这样就实现了关卡背景随着选关信息的变化而变化。